Note: Here we go in
via the NetApp icon under vSphere in ‘Solutions and Applications’, it is also
possible (with Storage Systems first configured in the ‘Backup and Recovery’
section of the NetApp VSC interface) to simply right-click a VM or Datastore
and Backup from there.


vSphere Client
> Home > Solutions and Applications > NetApp
Backup and
Recovery > Setup
- Click ‘Add…’ to add in the Storage System(s)
Image: NetApp VSC
4.1 Backup and Recovery - Setup

Note i: The
controllers might already have been added in under ‘Monitoring and Host
Configuration’ but they need to be entered again in the ‘Backup and Recovery’
section!
Note ii: The VSC
can also update SnapMirror relationships if you add in the remote Storage
System too.
Backup and
Recovery > Backup
- Under ‘All Backup Jobs’ click on Add… which brings up
the ‘Backup Wizard’
Image: NetApp VSC
4.1 Backup and Recovery - Backup (also showing fields)

Backup Wizard -
Step 1: Job Name
- Enter Name and Description
- Tickable options include: ‘Initiate SnapMirror update’,
‘Perform VMware consistency snapshot’, and ‘Include datastores with independent
disks’
- Click Next >
Image: VSC Backup
Wizard - Step 1

Backup Wizard -
Step 2: Virtual Entities
- Select either the VM(s) and/or Datastore(s) that you
want to backup
- Click Next >
Image: VSC Backup
Wizard - Step 2 with a selected entity of Datastore

Note i: If a Datacenter is selected in the
‘Entities’ drop down, the ‘Available Entities’ are Datastores.
Note ii: If a Datastore is selected in the ‘Entities’
drop down, the ‘Available Entities’ are VMs.
Backup Wizard -
Step 3: Spanned Entities
*This step is
skipped if there are no VMs that span datastores outside what was selected.
Otherwise - “Some of the virtual machines span multiple datastores. You can
exclude datastores from the backup.”
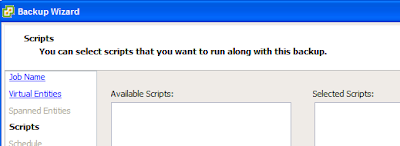
Backup Wizard -
Step 4: Scripts
- Select from the Available scripts (** that is if there are any - hope to write more on this at a later
date **)
- Click Next >
Image: VSC Backup
Wizard - Step 4 (currently showing no available scripts to select)

Backup Wizard -
Step 5: Schedule
- Select schedule as required from the options of Hourly,
Daily, Weekly, Monthly or One time only
- Click Next >
Backup Wizard -
Step 6: Credentials
- Specify the credentials which will be used to run the
backup job, this can be the ‘default vCenter credentials’.
- Click Next >
Backup Wizard -
Step 7: Retention and Alerts
- Specify backup retention based on maximum days, maximum
no of backups, or backup indefinitely
- Specify email alerts settings or set to ‘Notify on:
Never’
- Click Next >
Image: VSC Backup
Wizard - Step 7

Backup Wizard -
Step 8: Ready to Complete
- Review the Summary, and - if all is okay - tick whether
to ‘Run Job Now’ or not, and click Finish
Image: VSC Backup
Wizard - Step 8

The newly created backup job will then appear in the list
of ‘All Backup Jobs’ as in the example below.
Image: VSC 4.1
Backup and Recovery > Backup > All Backup Jobs

And if all’s working then tasks similar to the below
example should appear in the vSphere Client.
Image: vCenter
vSphere Client NetApp Create Backup tasks
Comments
Post a Comment