2) Browse down and we’re going to get Simulate ONTAP 8.2.2P1
for VMware ESX for Clustered ONTAP.
3) Click the Clustered-ONTAP
link to download the vsim_esx-cm.tgz
4) Once it has downloaded, use 7-Zip or similar to unpack
the tgz file
5) Use 7-Zip to unpack the .tar file
6) In your final unpacked folder, you should see a lot of
files like this:
Image:
vsim_esx-cm.tgz files

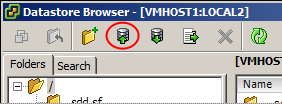
7) Via the vSphere Client and the Datastore Browser
Click on the Upload button
Image: vSphere
Client Datastore Browser Upload Button
7.1) Click “Upload Folder...”
7.2) Browse to the folder containing the files
7.3) Click OK
7.4) Accept “Yes” to the Upload/Download Operation
Warning
7.5) And wait for the folder to upload ...
Image: Waiting for
vsim_esx-cm to upload

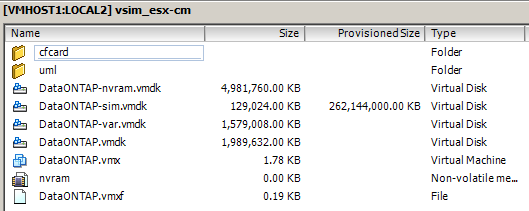
8) Browse to the newly uploaded folder using the vSphere
Datastore Browser
Image: vsim_esx-cm
files on the VMware datastore
8.1) Right-click the VMX file
8.2) Select ‘Add to Inventory’ and follow through the
wizard
9) Finally, right-click the DataONTAP SIM and ‘Power On’
Image: vSphere
Client -> Power on DataONTAP SIM

And we get an error:
Image: Error - Failed
to start the virtual machine ... cannot find ... DataONTAP-sim.vmdk

9) Now following the instruction in this community post:
9.1) Remove the disk on IDE (1:1)
Image: Removing IDE
(1:1)

Image: Remove from
virtual machine and delete files from disk

9.2) And create a new IDE disk on IDE 1:1, 250gb and thin
provisioned:
Image: 250GB Thin
Provision disk ...

Image: ... on IDE
(1:1)

Image: Add Hardware
- Ready to Complete ...

10) Take a VMware snapshot before first boot (so we can
create a clone from a pre-boot version of the SIM later - and perhaps change
the serial number which gets hard set once it has booted beyond boot loader ...)
11) And then power on the VM, and watch it boot!
Image: Booting the
DataONTAP SIM in ESXi

THE END
Thanks a lot
ReplyDelete